Showing posts with label kids room decorations. Show all posts

Monday, February 21, 2011

toddler bed valance (bed-skirt)

A while ago we made a cute toddler sized bed for Hugo. It has his cot mattress on it (1300mm long).

While there is plenty available in the way of sheets and blankets, there are no valances for this size mattress.

The quilt I made last year had some scraps remaining and I have since planned to make them into a valance to match. Yesterday, finally, it happened!


Hmm, doesn't look so great close up, because of the fraying, but that was the intention to get it matching with the quilt. The rag quilt.

It hides the ugly boxes of toys under his bed and the ugly bed frame.

It's so good to finish a project.

It's made of some old sheeting, the edges sewn up onto a basic rectangle the size of the bed frame (and mattress).

Thursday, February 10, 2011

tie-backs


These were so quick to sew up and make the room so much prettier.

We have quite plain (ugly) curtains (or you may call the drapes, depending on your heritage) and I thought these would be a good solution to keep the curtains away from the windows to let in maximum light and prevent them blowing in the wind when the windows are open. They also double as a  decoration, and I guess you could change them with the seasons and your mood...!?


Simply cut a piece of fabric and a lining on the fold in this sort of shape, no pattern required, sew right-sides together leaving ends free, turn right way out, insert some loops of fabric (sewn through the middle) into the ends and ta-da, you have a curtain tie-back. I finished mine with some hand sewing in matching embroidery thread, as it's too thick to get the machine through.


Each morning, Georgia rises and ties the curtains back. It's a nice little routine.

The fabric is some vintage Sanderson from my fabric stash. I made some in French vanilla colouring to match our bedroom too. Perhaps I'll photograph them one day.

Tuesday, February 8, 2011

handmade by little hands

During the holidays Georgia learnt to write. It was a self-led process whereby she first asked how to write and spell her name, then the rest of the family, and it grew from there. 
I soon realised she didn't have a copy of the alphabet to work with.
The wonderful font 'Schoolhouse Printed A' shows pretty standard formed letters so I put together an alphabet and some pages of family names for her to read from.

She reads it during naps and in the morning sometimes, reciting the alphabet song. But otherwise all her writing is done by asking us to call out letters for whatever word she wants to write.

Understandably she wants to share her new skill with people so any picture she draws is usually dedicated to someone and their name written on it, then 'from Georgia'. 

You can see an early attempt here. She has chosen to write capital letters at this stage, so I won't confuse her with little letters until she's ready.

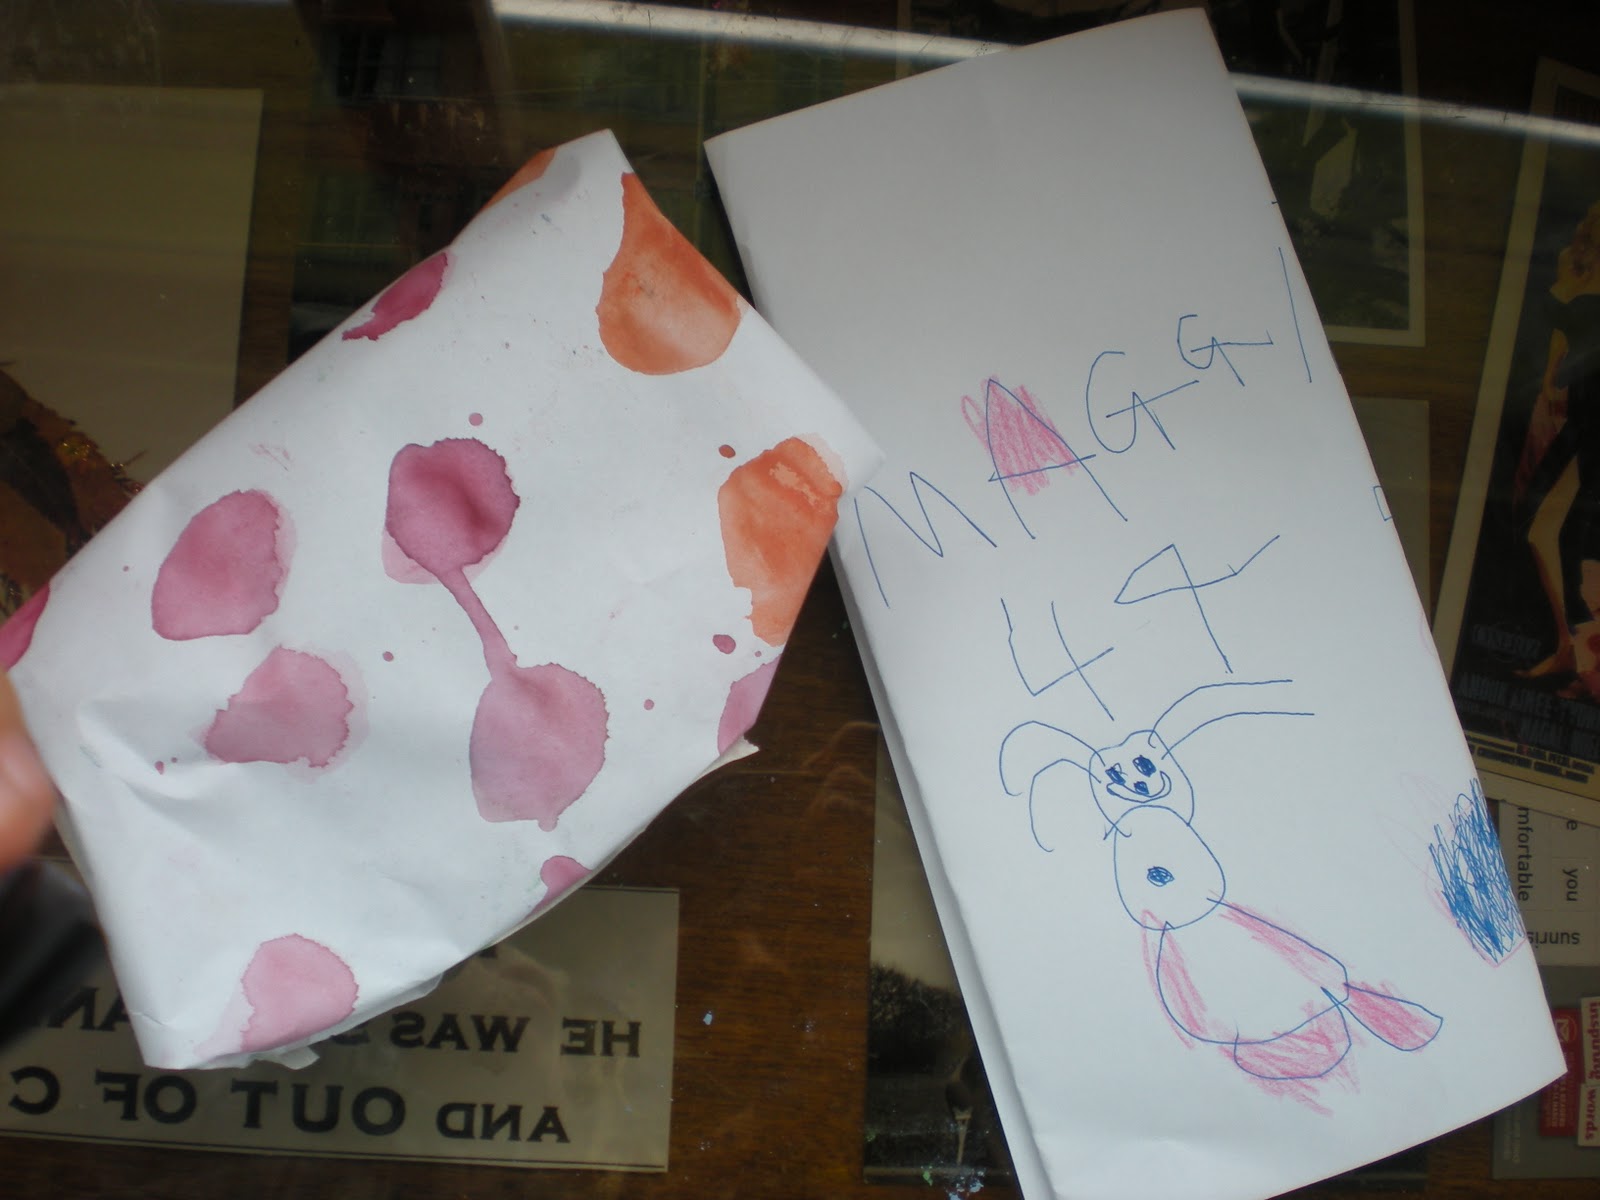
She went to Maggie's 4th birthday the other day so she made a card and some wrapping paper.


It was so cool to see her sense of pride at having made something herself to give. The present was, at Georgia's request, a small set of stationery so the birthday girl could give it a go herself.

Thursday, January 13, 2011

another mobile

While we're on the topic of baby mobiles, here is another I just finished.  By finished, I mean put on the final touches and weaved in the loose ends. I finished it, more generally, months ago. I always dislike the final finishing touches, and this time I can only blame it on the baby. She came along nearly a month early and it put paid to several of my knitting projects at the time. I was lucky to have it in a hangable state, truth be told.

Without further ado, I introduce the Bunnies. All knitted with wool from my stash, most of it collected from rounds at the second hand shops. All wool, not that it matters for a mobile.
The blue and pink bunnies were first to be knitted as gifts to Georgia and Hugo from the new baby. I couldn't stop there - the new baby had to have one too. So I knitted three. Then I only needed to make one more to make the mobile complete, so I knit the fourth. Gold and silver.
The pattern again comes from the lovely Vintage Knits for Modern Babies by Hadley Fierlinger. The pattern is called Bunny Mobile and it is made up of Nana's Bunnies. I love all the patterns in this book and will hopefully get a few more done [before] this winter.

The mobile will eventually move rooms with Adelaide so for now it is simply hung on a picture hook on the wall. For all the hours of work that went into it (compared with the paper version below) I'm surprised at how non-fussed I am at this ill-fitting hanging job. Can anyone give a name to that feeling you get when you've just had enough of a project, still love it, but just don't want to give it any more, for the time being anyway. That's not precise enough. Here's a go - it is a cross between weariness and restlessness (which both happen to be synonyms for boredom). Insouciance.

Wednesday, January 12, 2011

making something of nothing

The other night I read to the kids from a 'new' book called Fern Hollow. I got this book second hand when they were too small but only at Christmas time did I flick through it and realise how wonderful the pictures are and how gorgeously simple and elegant are the stories and characters.
So, I was reading to the kids, Hugo and Georgia, as they oohed and aaahed away with each turning page. It must have been magical for them, all these new, colourful creatures coming to life before their eyes. Yes, we love good books in this household. Some, a little too much, I'm afraid.
Hugo asked to keep the book with him while he went to sleep, as he often does. We oldies went outside to continue a little window renovation work while the sun was still up.
Minutes later, screeching from the bedroom.
Georgia,
"Hugo's ripping the book!"
There was the book in absolute tatters. (No photo of this, too mad)
I was so mad (as I said)*.
I took the paper and the book and threw it in the bin.
An hour later, I took it out of the bin.
I slept.
I woke up and started cutting, then an idea formed and an hour later we had
this 


hanging in the kids' room. 

Yes, making something of nothing. And we managed to rescue most of the book (it's a collection of stories).
*But my heart was singing too because my small boy had loved the book to pieces, literally. He's done this before, yes, but only ever a little rip, usually the cover. And as I surveyed the ripped pictures I could see he had ripped his favourite pages of the train-ride, the sandcastles and the birds. Singing.

Saturday, November 6, 2010

a bean bag for the little ones

I made this bean bag a few months ago when I found the kids needed a chair of their own for lounging on.
There was a good tutorial on the net. I followed the instructions pretty fully. Had to copy and trace the pattern onto newspaper. I liked the idea that it has a lining, for strength and safety. There is also a nice tutorial and pattern in Kelly Doust's new book, the Crafty Kid. It has more of a 'back' to it and a traditional bean bag shape.
So mine was easily sewn together with a good spout in the lining for filling with the beans. Boy was it a prick to fill though - the beans went everywhere and on our wooden floors they resisted the broom with static electricity, went under the bed. Had to be vacuumed up in the end. (I was terrified of leaving any trace of them around as I understand they are a pretty bad suffocation risk if inhaled by small children!)
All in all, it's sturdy, attractive, useful, can be tucked away behind a chair easily enough.

Seats two (they're under 15kg each)
or one baby (supervised)
and is Dad's favourite footrest too.

The fabric was a mix of found materials from the op-shop and an auction.

Friday, October 29, 2010

Rag quilt


Phew, done. This beautiful 'rag quilt' for Hugo.
Easy as, simply cut squares of fabric, either two or three layers depending on thickness, I was told a layer of cotton, flannel in between, and cotton again on the back is recommended. Don't use stretch fabrics, I tried some stretch merino wool and it was a mess, the quick-unpick ripped out some tangled seams.
Quilt with an X.  


then stitch together in your desired pattern. I found it easiest to complete rows first, then sew rows together. If the corners were too thick (or not matching up as well as you'd like) I suggest doing what I did sometimes - stitching square by square, reinforcing seams with backstitching. Otherwise, if things were looking good I'd lay the top seam facing forward and the underneath seam facing backward and push it through the machine. The fabric caught by this needs to be snipped out to freely fray, if you get what I mean...

 Now down to business. Trim the sides into fraying notches. If you have spring-loaded scissors, use them now. I didn't, and it wasn't bad at all using regular sewing scissors (they must be sharp though).
Throw into the washing machine, then the clothes dryer (regular cycles).
The more you wash the greater it looks (more frayed).
[with flash]

[without flash]


Some details:
Fabric is by Heather Bailey, her Nicey Jane line. The lime green with birds and flowers is by Patty Young for Michael Miller (Hummingbirds in Lime, some available here on NZ site trademe). Love these fabrics, the colours are sorta juicy, edible, and they go so well with the walls. Tried to choose boy colours, but young boy colours and they had to please me and Georgia too (who shares a room with him).
The size is for standard (American) cot size, 1300mm long. The squares are 20cm with 1.5cm (1/2 inch) seam allowance. I used 48 squares (8x6), so used 5 colours, 40cm (1/2 yard) each with one colour using only 8 squares while the rest used 10.


The backing is some micro-fleece I bought to make Hugo a dressing gown. The grandies bought him one so I didn't need to make one. I had nearly enough, so made up the rest of the squares withe some vintage blue felted wool and I cut up a yellow baby's sleeping bag I didn't use. I laid them using a quick sketch plan of colours, randomly placed with an attempt to have one colour each row somewhere. Didn't look at the back, but I knew it would work out ok because the fronts were planned and mainly used just one colour for each different coloured backing fabric. But really, was just random.


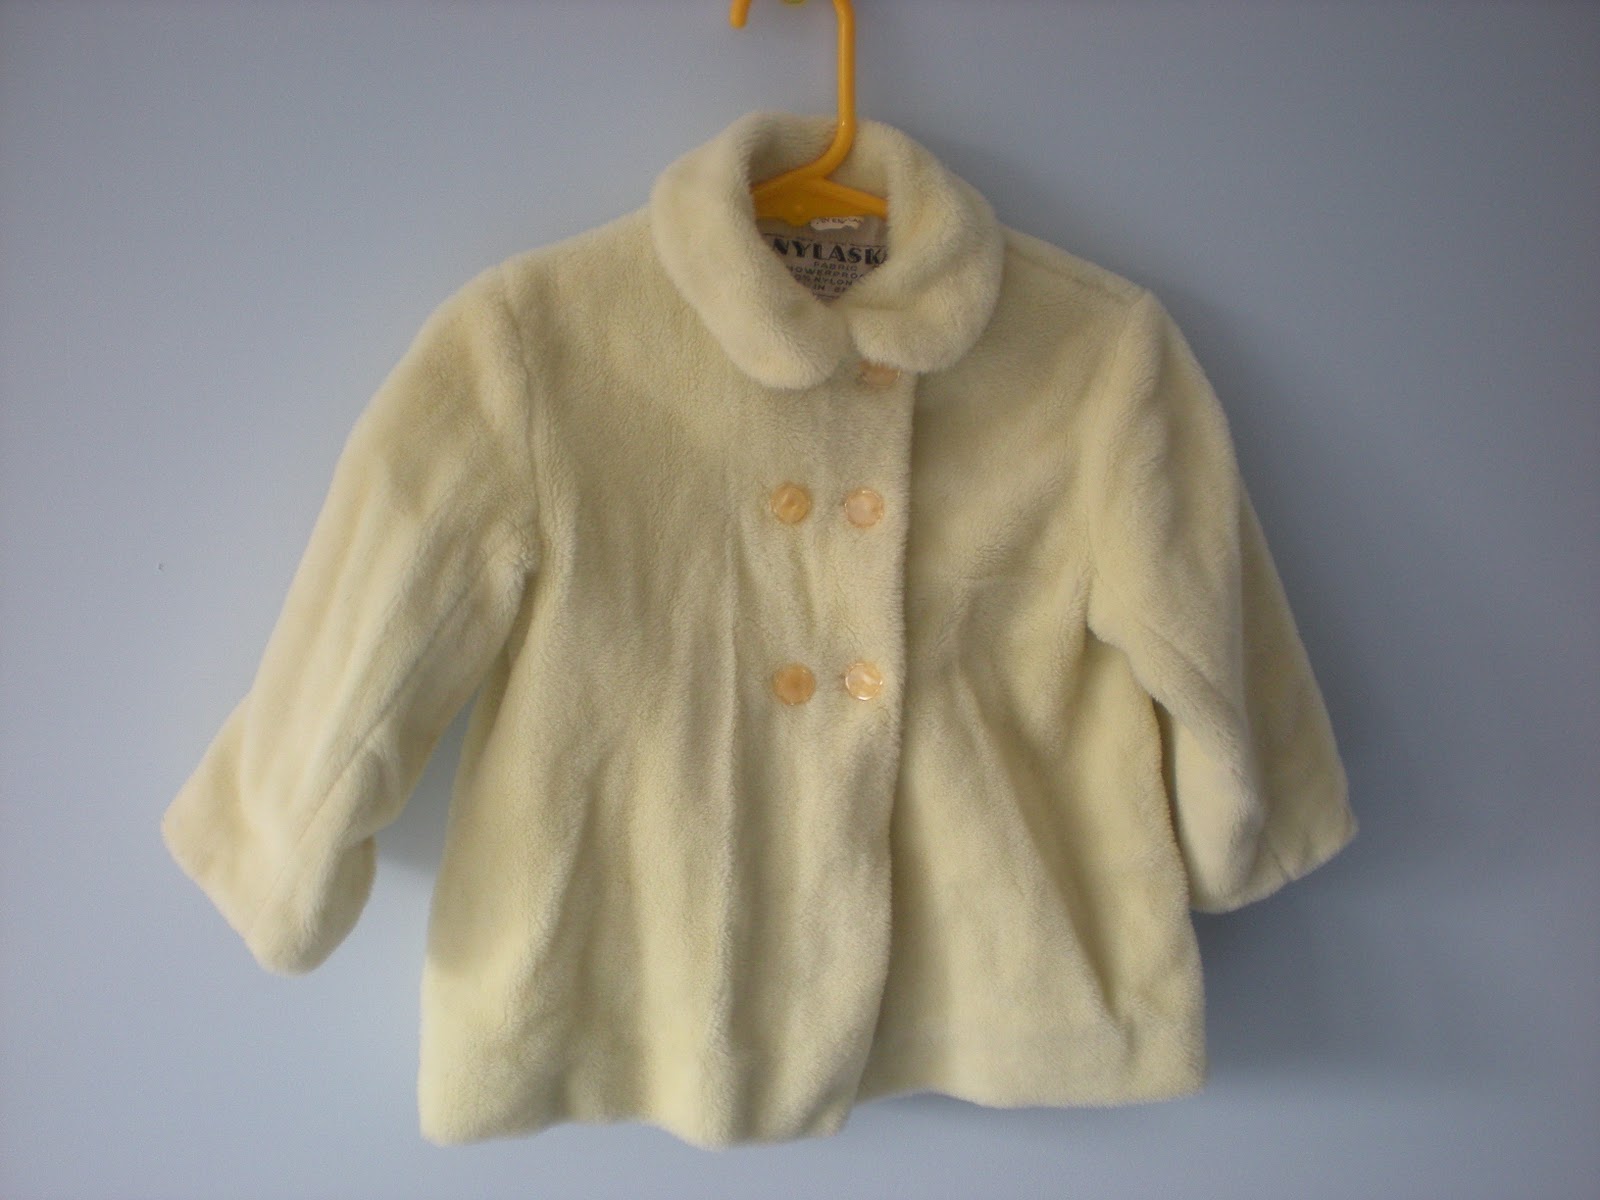
Can you believe I almost cut up this  cutie little vintage yellow baby's coat? I didn't use it for Georgia and it's been stored away since, but actually I think Adelaide will be the right size for it next winter. So glad I kept it.


The thread is this Metler poly sheen multi, 100% polyester, Japan made, no.40 - and it changes from blue to gold to brown as you go. It added interest and something special to the handmade appeal of making your own quilt. If nobody else notices it, at least I'm glad I used it.
Apparently these quilts are popular at the moment. I can see why. They look snuggly, they ARE snuggly! They are beautiful, they show off your favourite fabrics. Quick and easy to make (mine took approx two mornings plus cutting time) and they are a good introduction to quilting. You can use a regular sewing machine, and you don't need to quilt the thing in its entirety, just square by square.
This is my first quilt. I think I'll be making more of these, in girl colours. I can't wait!

Thursday, October 21, 2010

toddler bed

While we're on the subject of Dad making things too, here is the little toddler sized bed Chris made for Hugo. It is the same size as his cot, but without the sides. We're gonna have to cram three kids into the one room very soon. Two big single beds doesn't make sense, and he's going to be little for at least a few more years. So here was the solution: DSCN0490a 

He made it out of four-by-two and MDF for the slats (which are secured by screws). We were concerned about the sharp (sanded back) corners so stapled on some circles of camp mattress foam to protect little heads and limbs from taking a bang. He hasn't finished yet, it needs a headboard and some better padding around the rim.  DSCN0491a
And I have to sew a valance and a new quilt (my first attempt it will be! I've been eyeing up this pattern and these fabrics which sell at a local shop). More on quilts coming up soon.
Hugo loves his new bed. It's his 'big boy' bed. He's been in it a few days now and he's even staying in it for his afternoon sleeps, so I'm keeping my sanity. So thanks Dad for taking the initiative and making something so neat for the kids!

wall art

Well, a cheap and easy way to put some art on the walls of the freshly painted kids' room. This old puzzle was a hit when I was young. I used to collect stamps, or more accurately, organised and consolidate my Opa's collection. 

DSCN0343
Yes, it is a map of NZ, with Maori traditional costumes on, these images considered a bit kitch here these times.
Anyways, real easy, just glue a favourite puzzle to a board and pin to the wall (or frame it if you have enough money - that is my ultimate goal!).
Some more cheap wall art coming up soon - recycling old books.